Blog
Mastering Gift Wrapping Techniques: Tips and Tricks
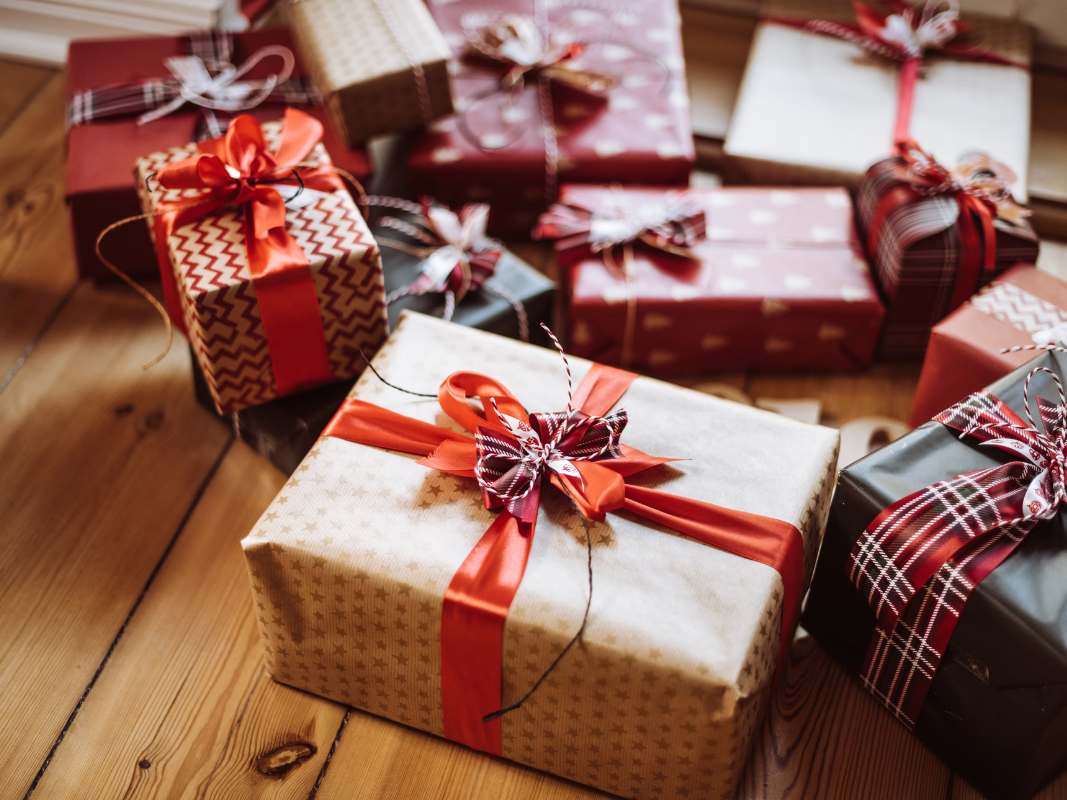
Gift wrapping is an art that enhances the joy of giving and receiving presents. The presentation of a gift can elevate the recipient’s experience, adding a layer of thoughtfulness and care. This article explores various gift wrapping techniques from traditional to modern, eco-friendly to cultural, and creative methods that make gift wrapping a delightful endeavor.
Traditional Gift Wrapping Techniques
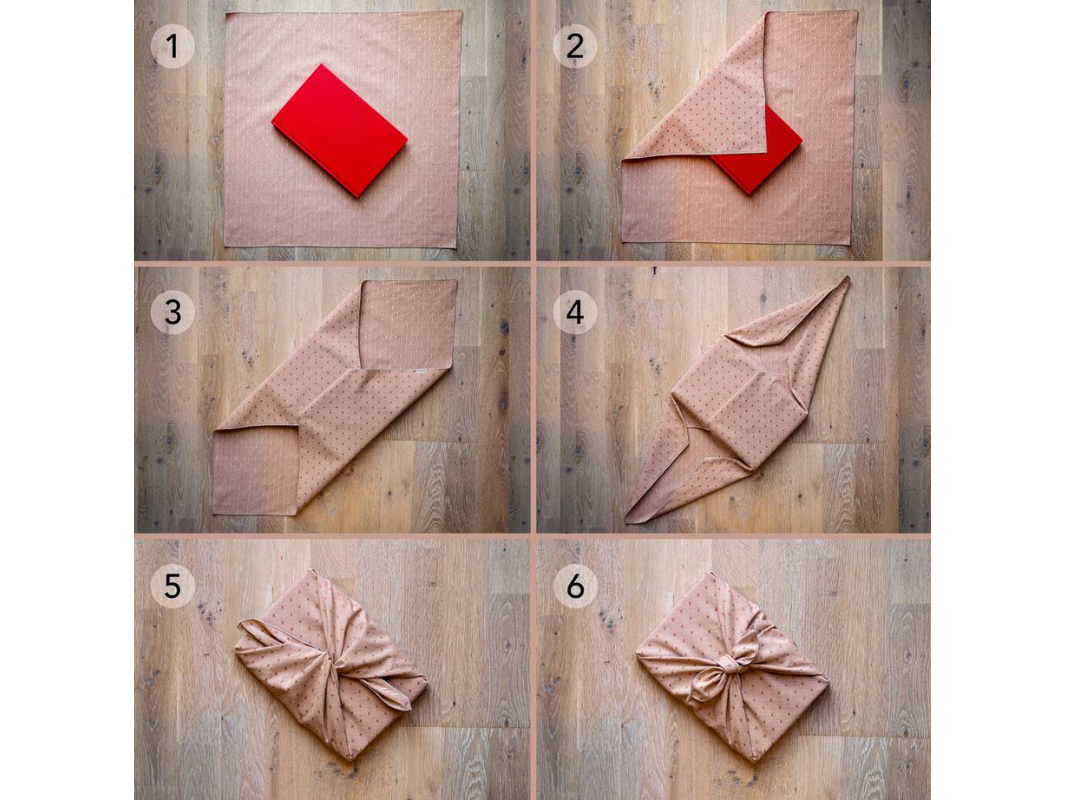
Furoshiki (Japan)
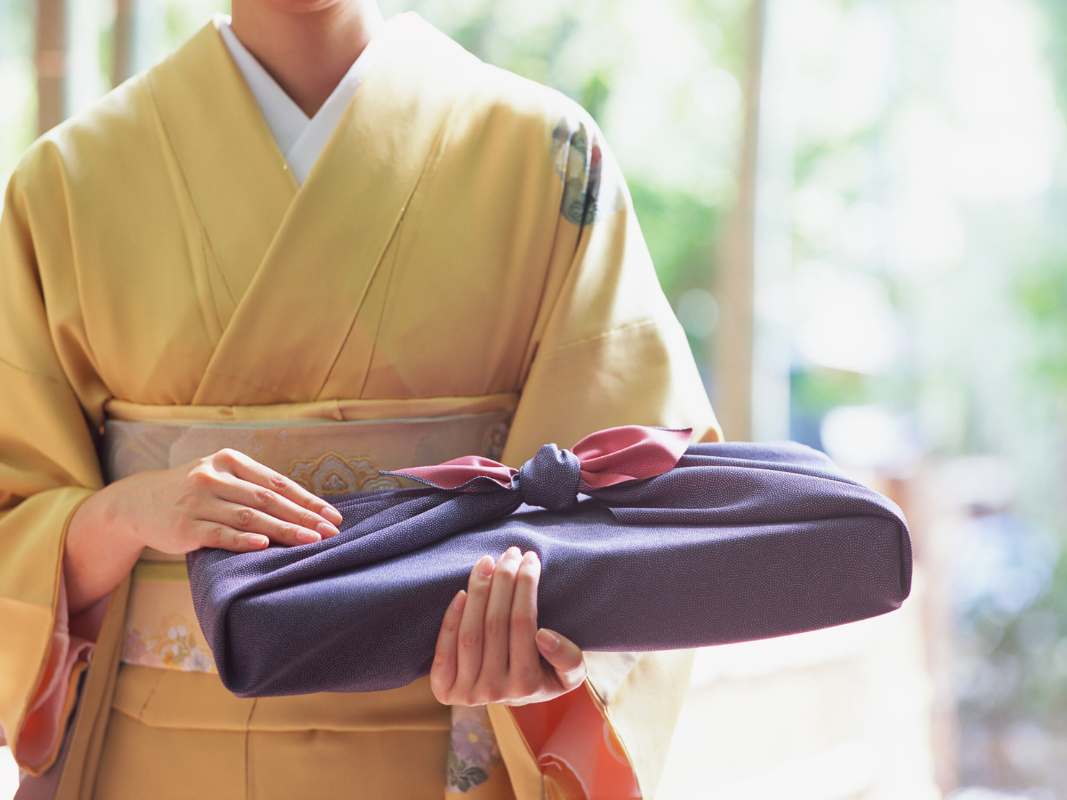
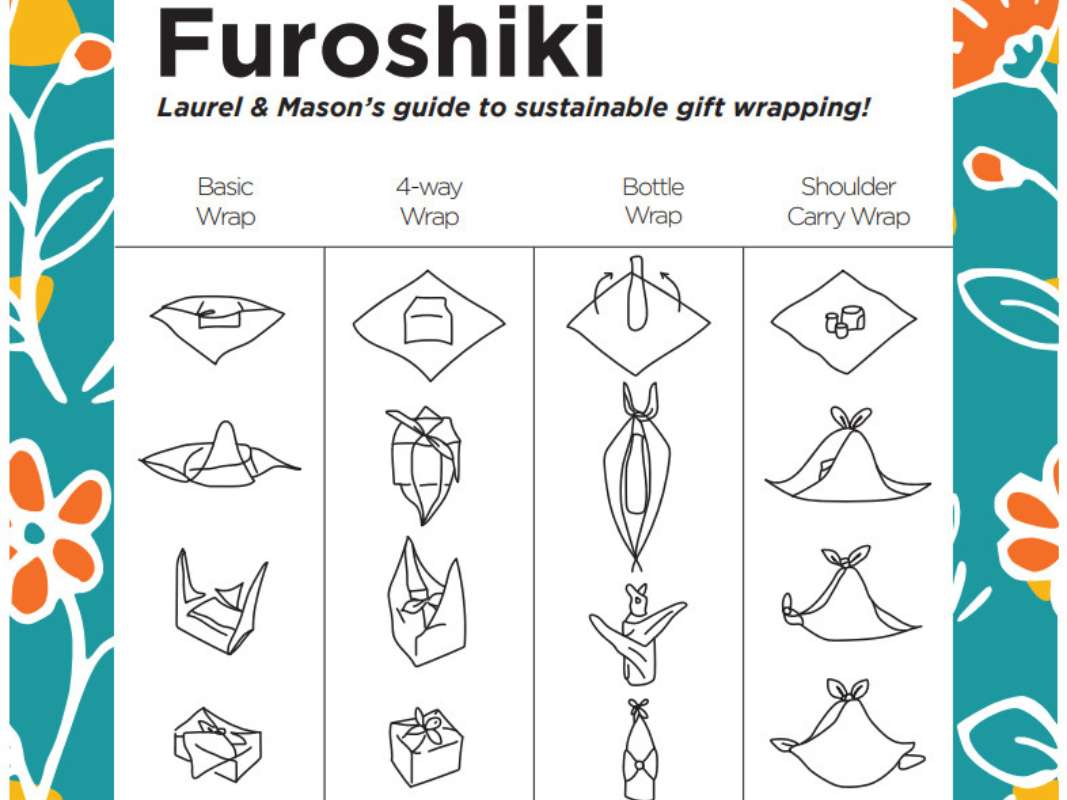
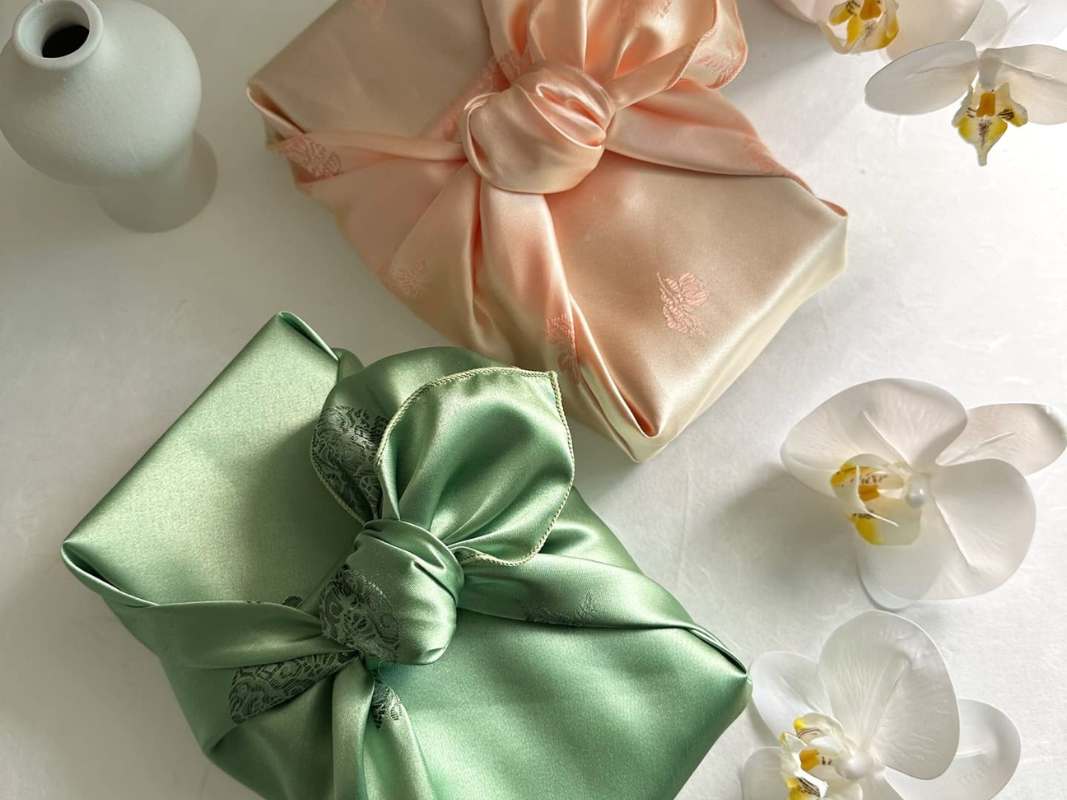
Furoshiki is a traditional Japanese wrapping cloth used to transport goods and wrap gifts. This versatile technique involves folding and tying a square piece of fabric in various ways to secure the contents.
- Styles and Uses: There are multiple wrapping styles, such as the “basic wrap” for simple items and the “two-bottle wrap” for carrying bottles. Each style can be adapted based on the shape and size of the gift.
- Cultural Significance: Furoshiki embodies the Japanese principles of resourcefulness and respect for the environment. The reusable fabric promotes sustainability, making it an eco-friendly wrapping option.
- DIY Guide:
-
- Materials Needed: A square piece of fabric (preferably cotton or silk).
- Basic Wrap:
- Lay the fabric flat, with the gift in the center diagonally.
- Fold one corner of the fabric over the gift, tucking it under slightly.
- Fold the opposite corner over the gift, pulling it tightly.
- Tie the remaining two corners in a knot over the top of the gift.
- Two-Bottle Wrap:
- Place the two bottles in the center of the fabric, parallel to each other.
- Fold the fabric over the bottles, rolling them until they are completely wrapped.
- Stand the bottles up and tie the ends of the fabric into a knot.
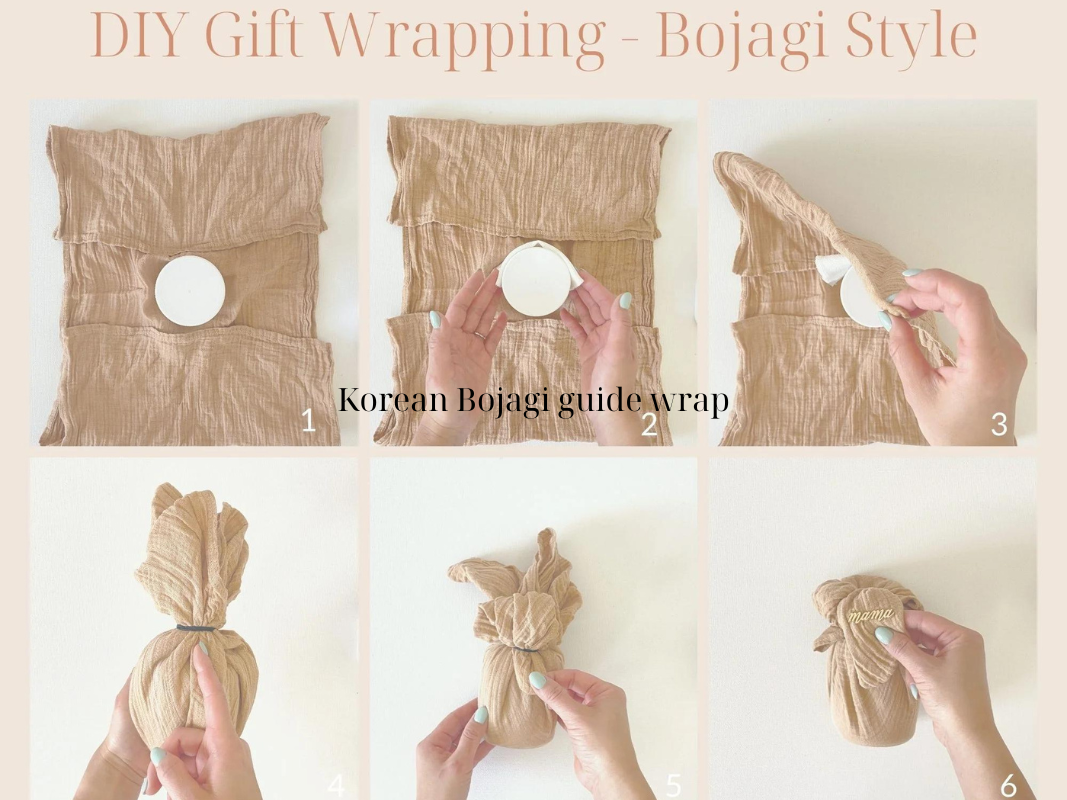
Korean Bojagi (Korea)
Bojagi is a traditional Korean wrapping cloth that dates back centuries. It is often made from silk or ramie and features intricate patterns and vibrant colors.
- Techniques and Patterns: Bojagi can be used to wrap gifts, cover tables, or as decorative wall hangings. Common techniques include the “square wrap” and the “bundle wrap,” each tailored to specific items.
- Historical Importance: Bojagi holds cultural significance, symbolizing good fortune and protection. It is often used in ceremonies and special occasions.
- DIY Guide:
-
- Materials Needed: A square piece of Bojagi fabric.
- Square Wrap:
- Place the gift in the center of the fabric.
- Fold the fabric over the gift from all four sides, creating neat pleats.
- Tie the corners together in a decorative knot.
- Bundle Wrap:
- Place the gift in the center of the fabric.
- Gather the fabric around the gift, bringing all corners to the top.
- Secure with a ribbon or a decorative knot.
Batik Wrapping (Indonesia)
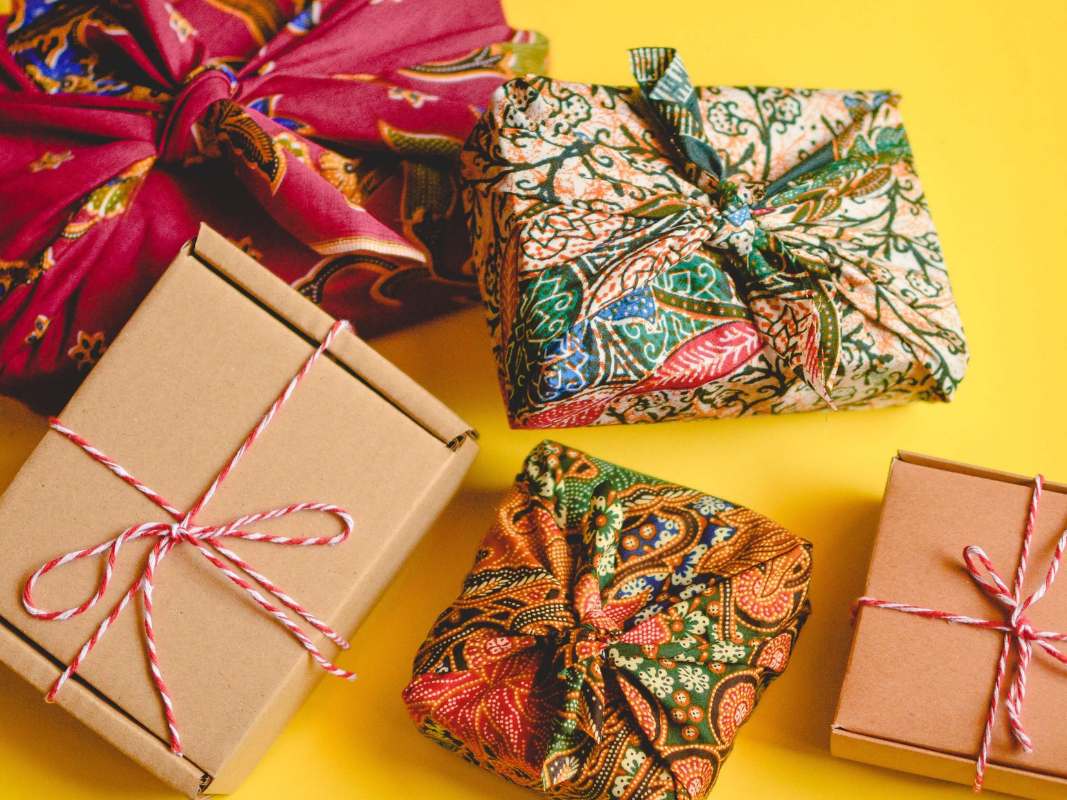
Batik wrapping utilizes traditional Indonesian fabric decorated with wax-resist dyeing techniques. Batik cloth is known for its intricate patterns and vibrant colors, making it an excellent choice for special gift wrapping.
- Techniques and Patterns: Each piece of batik fabric is unique, often featuring motifs such as flowers, birds, and geometric shapes. Gift wrapping techniques can include simple folds and knots to showcase the beautiful patterns.
- Cultural Significance: Batik holds a prominent place in Indonesian culture, symbolizing various aspects of life and heritage. It is often used in ceremonial contexts and celebrations.
- DIY Guide:
-
- Materials Needed: A piece of batik fabric.
- Simple Wrap:
- Place the gift in the center of the fabric.
- Fold the fabric over the gift from one side, then fold the opposite side, tucking it under slightly.
- Fold the remaining two sides over the gift and tie them together in a neat knot.
- Decorative Wrap:
- Use additional pieces of batik fabric to create decorative bows or ties.
- Add small batik-covered items, such as pouches or ornaments, to enhance the presentation.
Modern Gift Wrapping Techniques
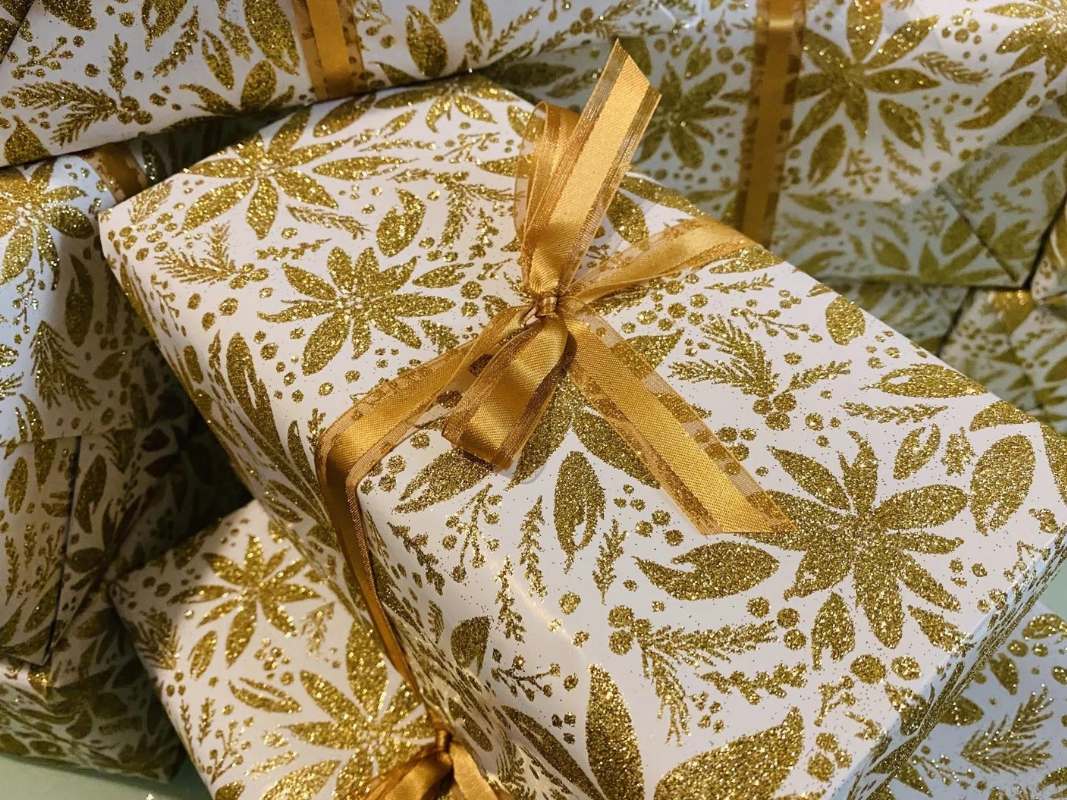
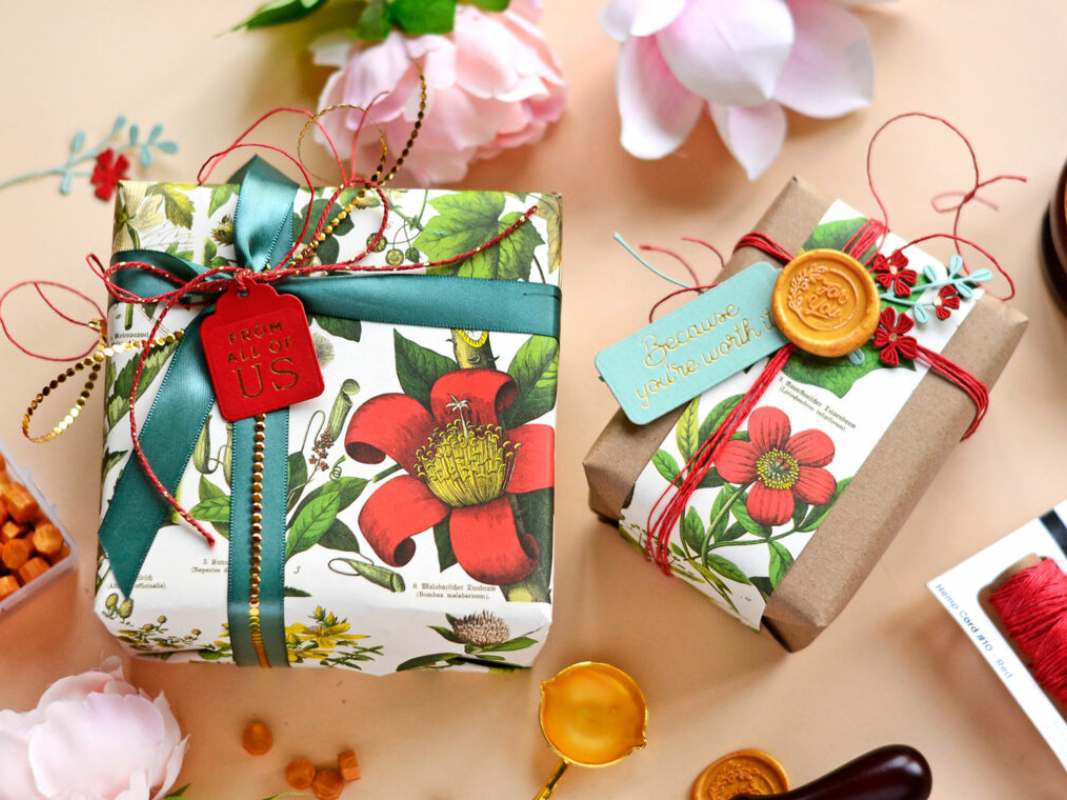
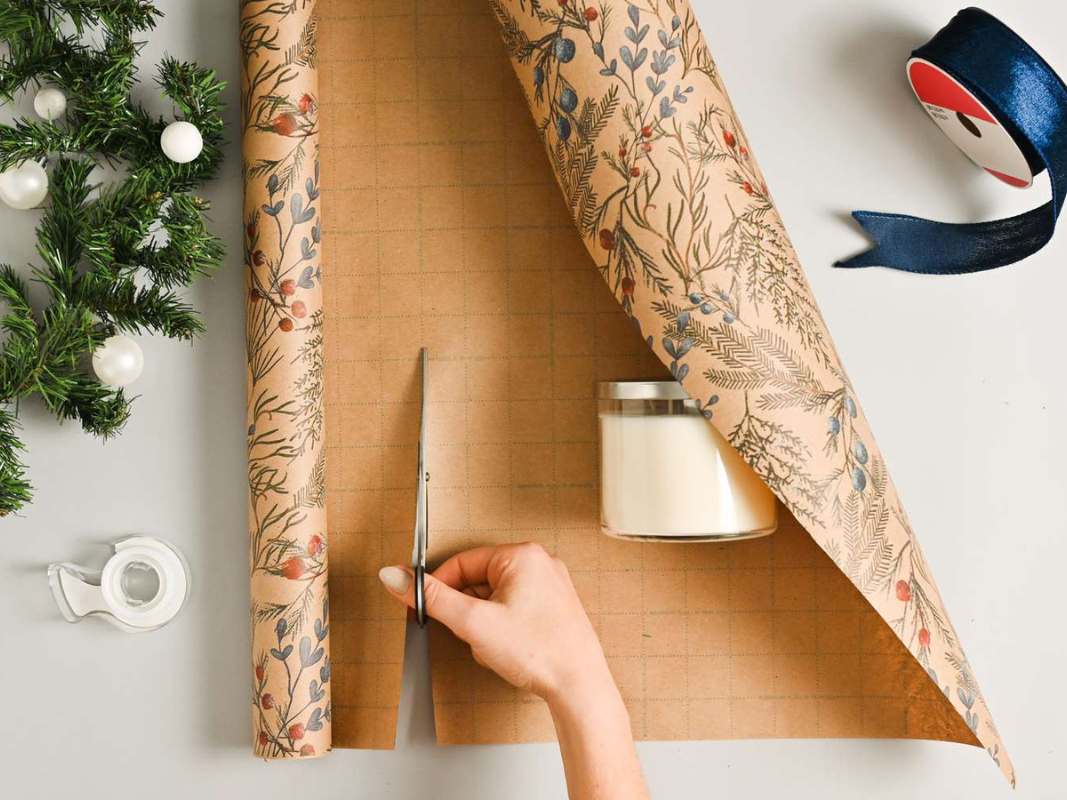
Classic Wrapping Paper
Using classic wrapping paper is a staple in modern gift wrapping techniques. It allows for creativity and personalization.
- Step-by-Step Guide:
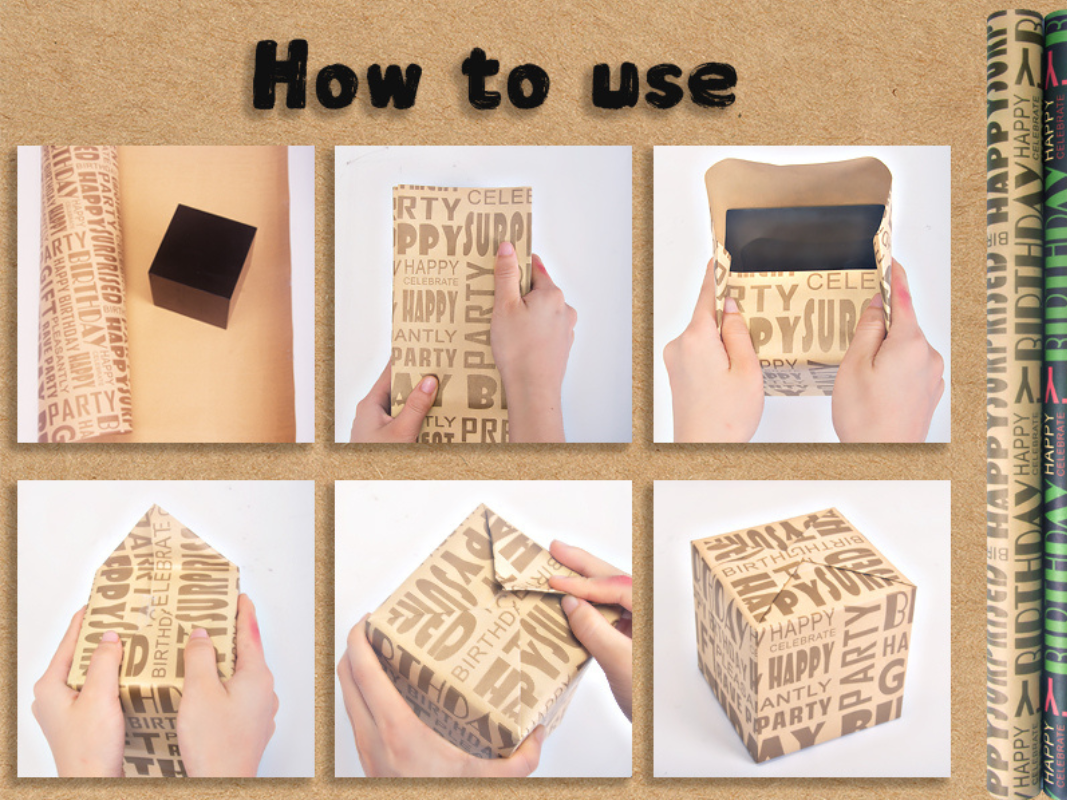
-
- Materials Needed: Wrapping paper, scissors, tape, ribbon, and gift tags.
- Steps:
- Cut the wrapping paper to the appropriate size, ensuring it covers the gift completely with a slight overlap.
- Place the gift in the center of the paper.
- Fold one side of the paper over the gift and secure with tape.
- Fold the other side, pulling tightly, and secure with tape.
- Fold the edges of the paper at each end of the gift to create neat triangular flaps.
- Fold the flaps over the ends of the gift and secure with tape.
- Add a ribbon and gift tag for a polished look.
- Creative Ideas:
- Use contrasting colors, patterns, or textures to create visually appealing packages.
- Personalized wrapping paper with photos or messages adds a unique touch.
Gift Bags and Tissue Paper
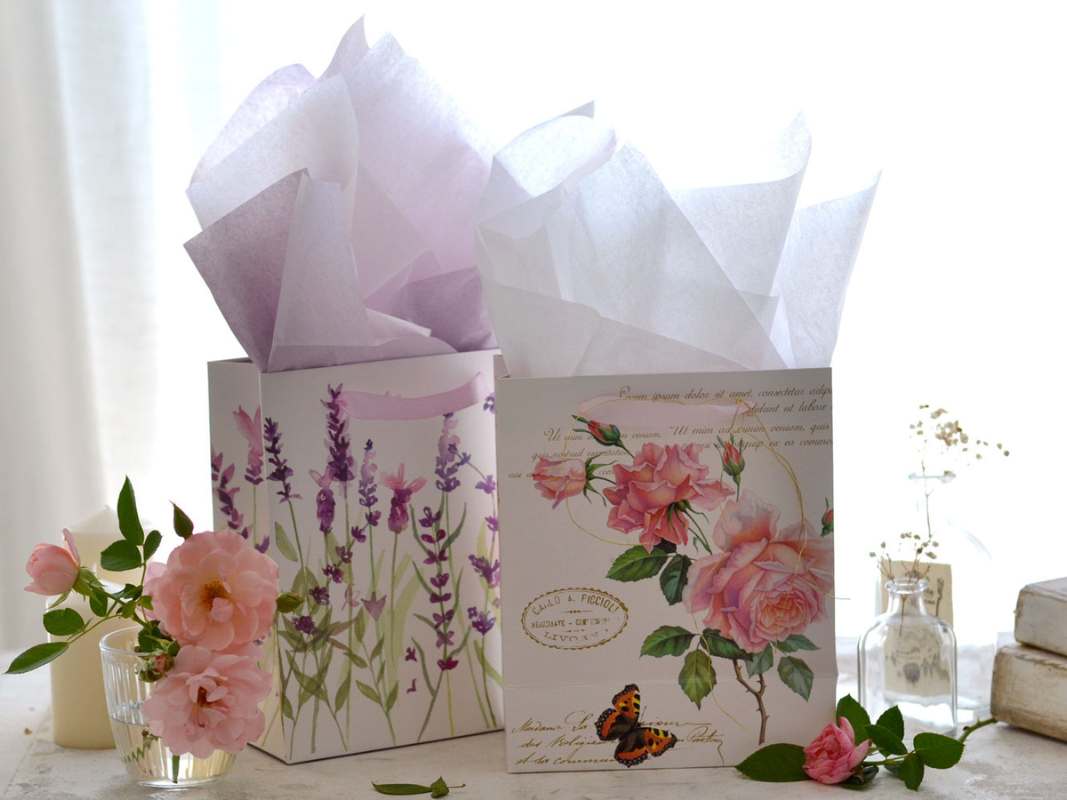
Gift bags are a convenient and stylish alternative to traditional wrapping paper, especially for irregularly shaped items.
- Efficient Use:
- Materials Needed: Gift bags, tissue paper, and decorative tags.
- Steps:
- Choose a bag that fits the gift, and place it inside.
- Line the bag with tissue paper, ensuring some paper sticks out of the top.
- Arrange the tissue paper around the gift for a finished look.
- Add a decorative tag or ribbon to the bag handles.
- Occasions:
- Gift bags are perfect for birthdays, holidays, and casual gift exchanges.
- They are reusable and can be dressed up with additional decorations.
Eco-Friendly Gift Wrapping Techniques
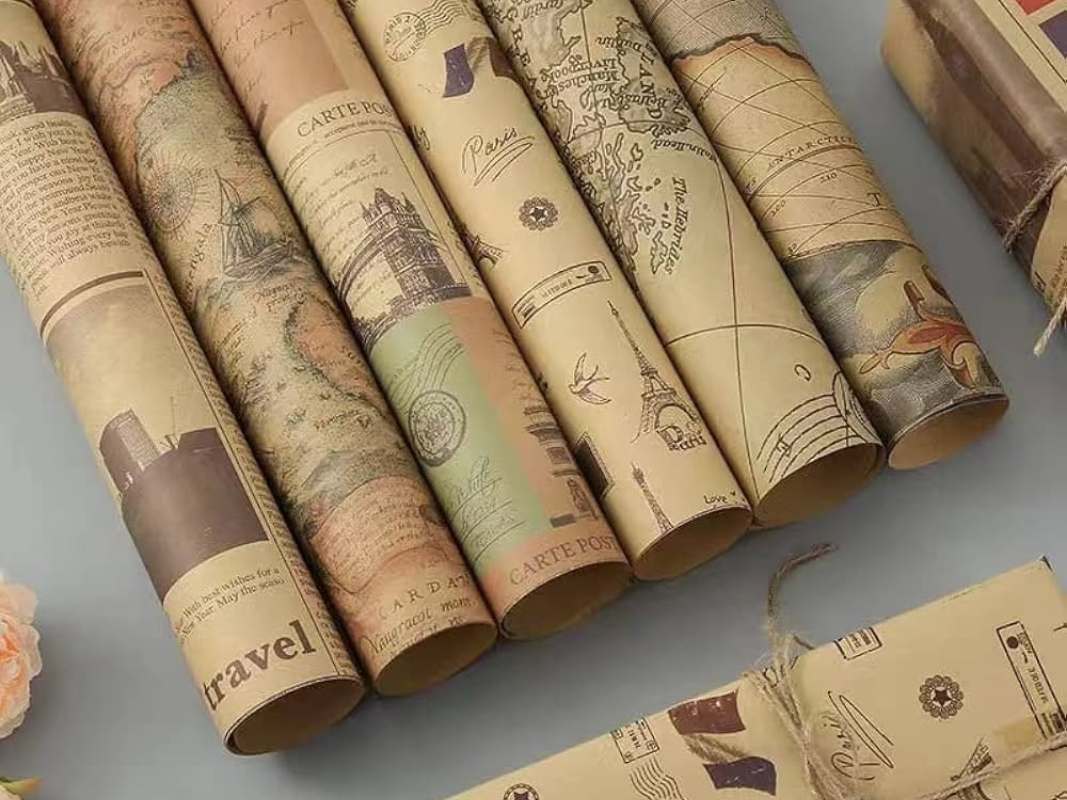
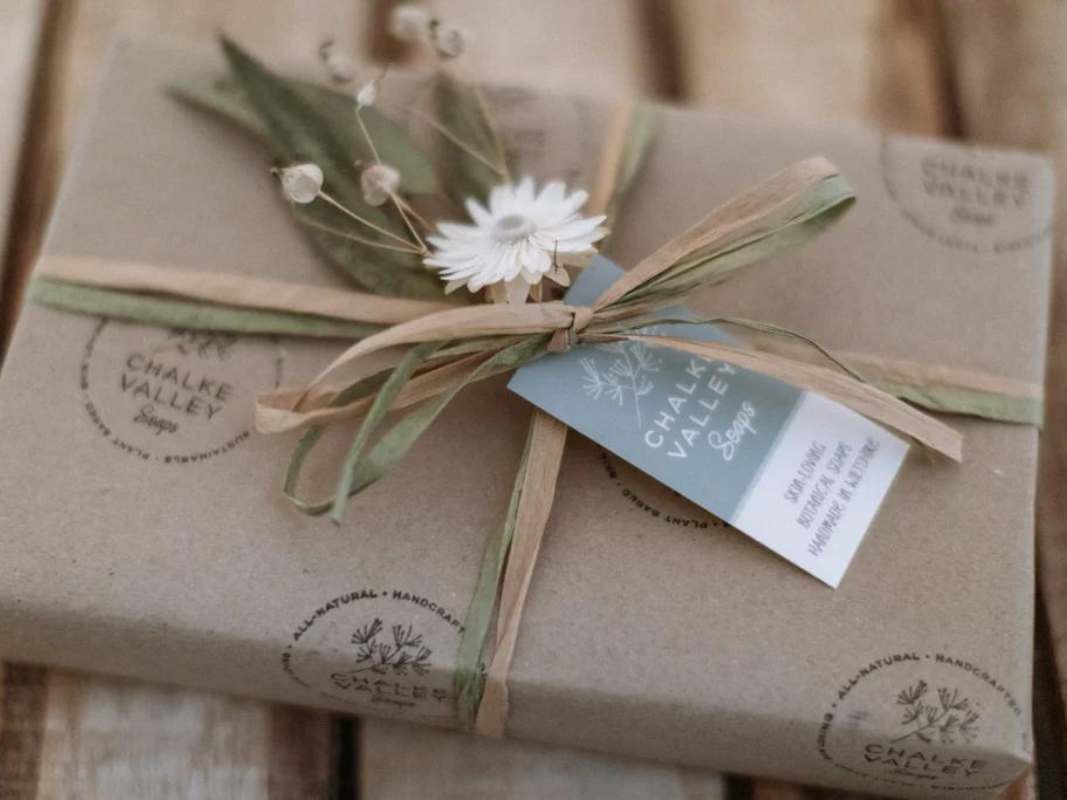
Recycled Paper and Materials
Using recycled paper and materials is an environmentally conscious way to wrap gifts.
- Ideas:
- Newspaper, brown paper bags, and old maps can be repurposed as wrapping paper.
- Decorate with stamps, stencils, or natural elements like dried flowers and leaves.
- Benefits:
- Eco-friendly wrapping reduces waste and promotes sustainability.
- It also encourages creativity in finding new uses for everyday items.
- DIY Guide:
- Materials Needed: Recycled paper (newspaper, maps), twine, stamps, and ink.
- Steps:
- Cut the recycled paper to size and wrap the gift as you would with regular wrapping paper.
- Secure with twine instead of tape.
- Decorate the paper using stamps or stencils.
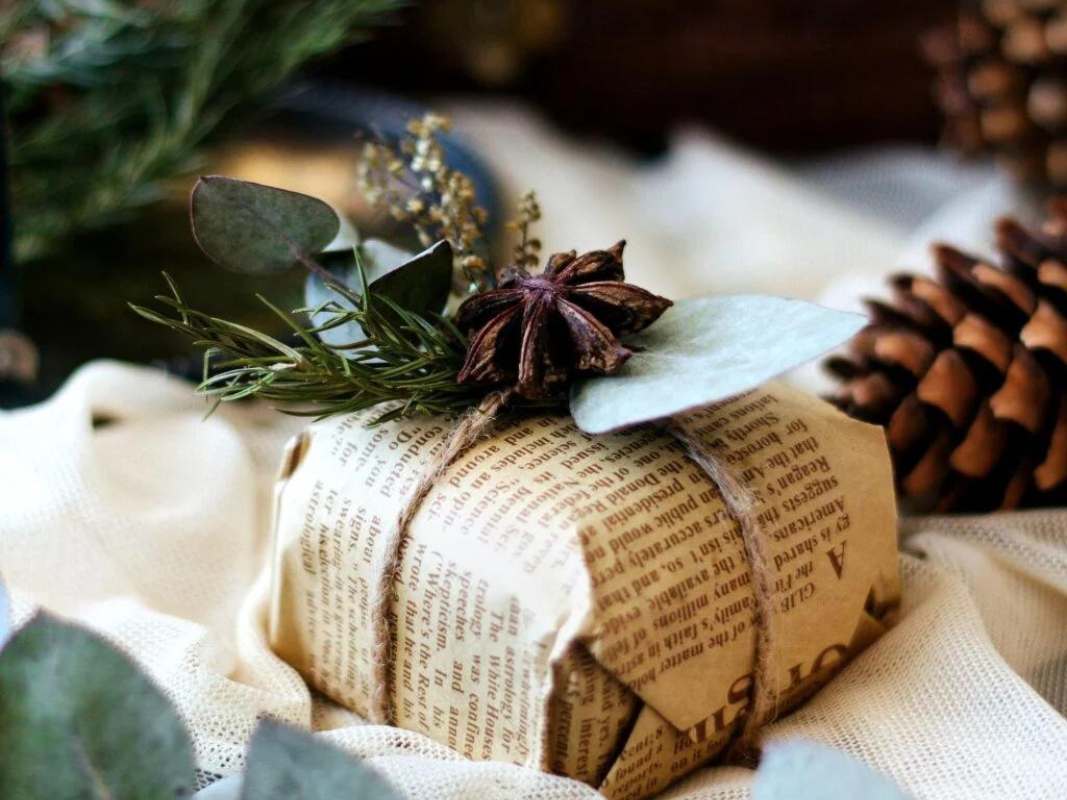
Natural Elements
Incorporating natural elements into gift wrapping adds a rustic and elegant touch.
- Guide:
- Materials Needed: Twine, burlap, and natural decorations such as pine cones, sprigs of holly, or lavender.
- Steps:
- Wrap the gift in plain brown or recycled paper.
- Tie a piece of twine or burlap around the gift.
- Attach natural elements to the twine or tuck them into the bow.
- Visual and Environmental Benefits:
- Natural elements enhance the visual appeal of the gift and are compostable, reducing environmental impact.
Cultural Gift Wrapping Techniques
Chinese Red Envelopes
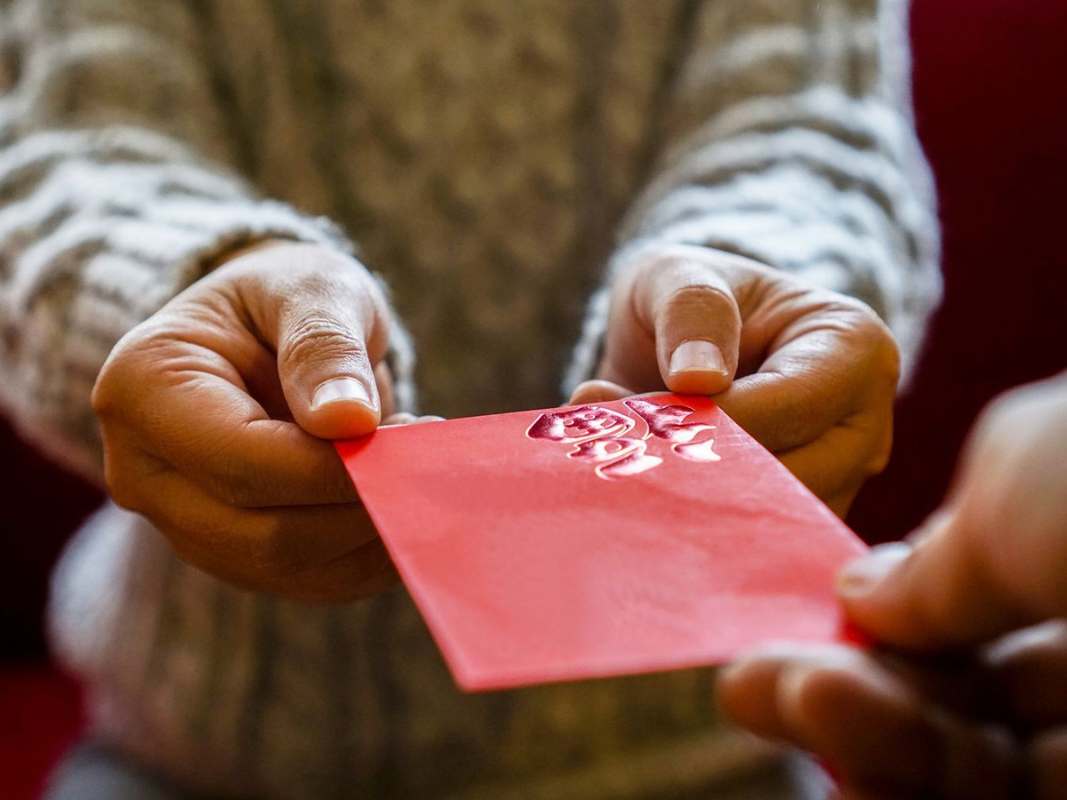
Red envelopes, known as “hongbao” in Chinese, are traditionally given during special occasions like Chinese New Year and weddings.
- Significance:
- The red color symbolizes good luck and prosperity.
- Envelopes often contain money as a gift.
- Presentation:
- Red envelopes are given with both hands as a sign of respect.
- They are often adorned with gold characters or designs symbolizing good fortune.
- DIY Guide:
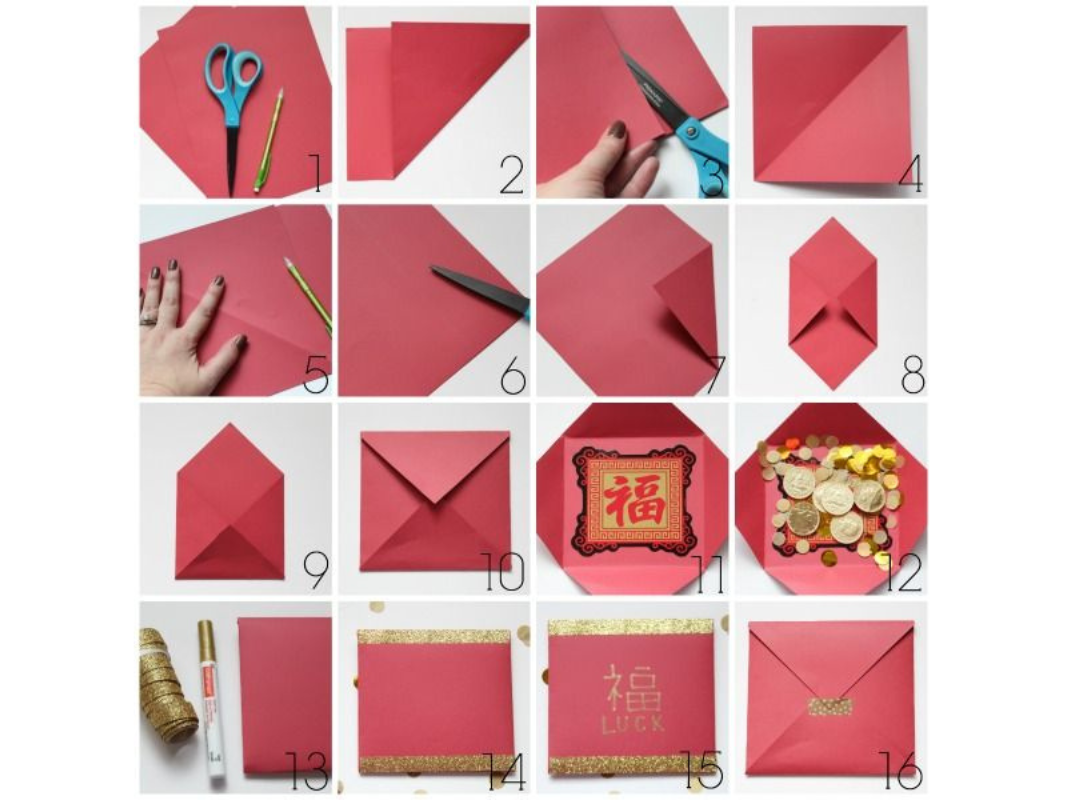
-
- Materials Needed: Red paper or envelopes, gold pen or stickers.
- Steps:
- Cut the red paper to envelope size and fold it into an envelope shape.
- Use a gold pen or stickers to decorate with auspicious symbols or characters.
- Place money or a small gift inside and seal the envelope.
Indian Wrapping Styles
In India, wrapping gifts with traditional fabrics like silk and cotton is common, especially during festivals and weddings.
- Techniques:
- Gifts are often wrapped in colorful fabrics and tied with decorative ribbons or tassels.
- The use of vibrant colors is significant, as different colors symbolize various aspects of life and culture.
- Cultural Significance:
- The choice of fabric and color reflects the cultural importance of the occasion and the relationship between the giver and the recipient.
- DIY Guide:
- Materials Needed: Traditional Indian fabric (silk, cotton), decorative ribbons, and tassels.
- Steps:
- Place the gift in the center of the fabric.
- Fold the fabric over the gift and tie the ends with decorative ribbons or tassels.
- Add additional decorations like beads or sequins if desired.
Creative and Artistic Gift Wrapping Techniques
Calligraphy and Hand Lettering
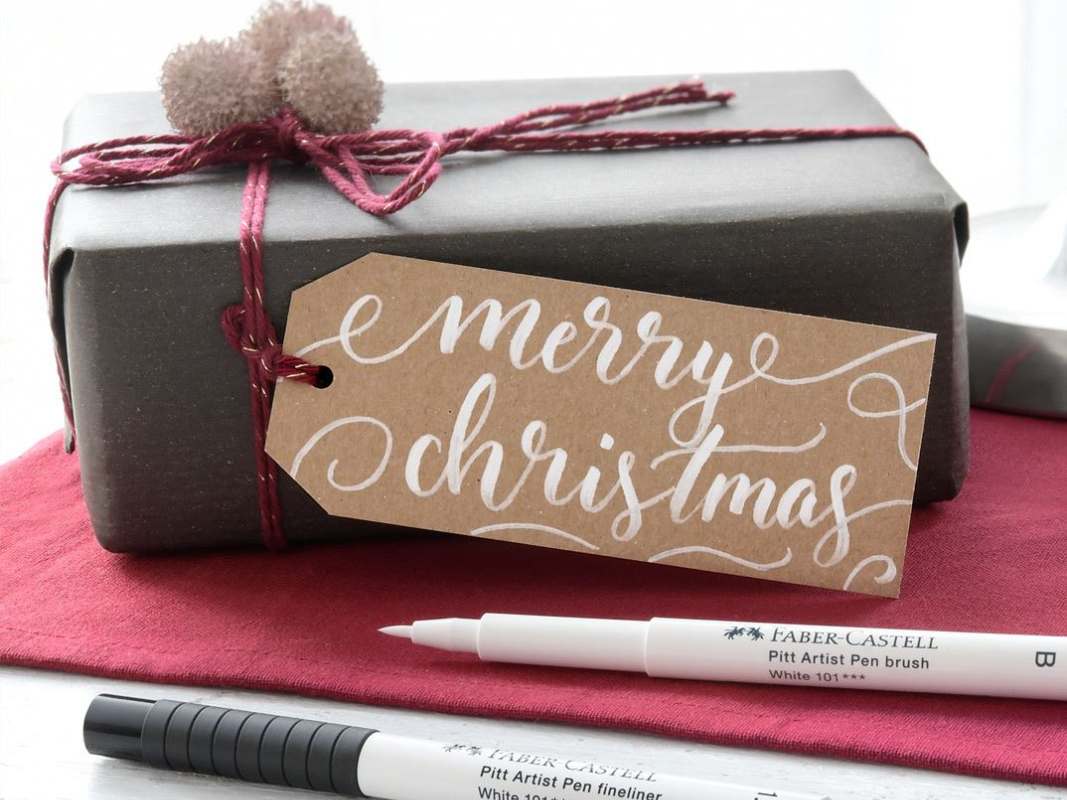
Adding calligraphy and hand lettering to wrapping paper creates a personalized and artistic touch.
- Techniques:
- Use calligraphy pens or markers to write names, messages, or quotes directly on the wrapping paper.
- Practice different styles and flourishes to enhance the design.
- Examples:
- Write a heartfelt message for birthdays, a festive greeting for holidays, or a simple “Thank You” for appreciation gifts.
- DIY Guide:
- Materials Needed: Plain wrapping paper, calligraphy pens or markers.
- Steps:
- Wrap the gift in plain wrapping paper.
- Use calligraphy pens to write a personalized message or design on the paper.
- Let the ink dry before handling.
Stamps and Stencils
Decorating wrapping paper with stamps and stencils allows for endless creativity and customization.
- Using Stamps:
- Choose stamps with designs that match the occasion, such as snowflakes for Christmas or hearts for Valentine’s Day.
- Use ink pads in various colors to create patterns.
- Using Stencils:
- Position the stencil on the wrapping paper and apply paint or ink with a sponge or brush.
- Create repeating patterns or unique designs for a personalized touch.
- DIY Guide:
- Materials Needed: Plain wrapping paper, stamps, stencils, ink pads, and paint.
- Steps:
- Lay out the wrapping paper on a flat surface.
- Position the stencil where you want the design to appear.
- Apply paint or ink over the stencil using a sponge or brush, ensuring even coverage.
- Carefully lift the stencil to reveal the design.
- Repeat the process as needed to create a pattern.
- For stamps, simply press the stamp into the ink pad and then onto the wrapping paper, repeating as desired.
Practical Tips and Tricks
Measuring and Cutting Paper
Accurate measuring and cutting ensure a clean and professional wrapping job.
- Techniques:
- Measure the gift and add extra for overlap. Use a straight edge or a cutting mat to achieve clean cuts.
- DIY Guide:
- Materials Needed: Wrapping paper, ruler, pencil, scissors.
- Steps:
- Place the gift on the wrapping paper and measure enough paper to cover the gift, adding an extra inch for overlap.
- Mark the measurements with a pencil.
- Use a ruler to draw straight lines for cutting.
- Cut along the lines using scissors.
Tying the Perfect Bow
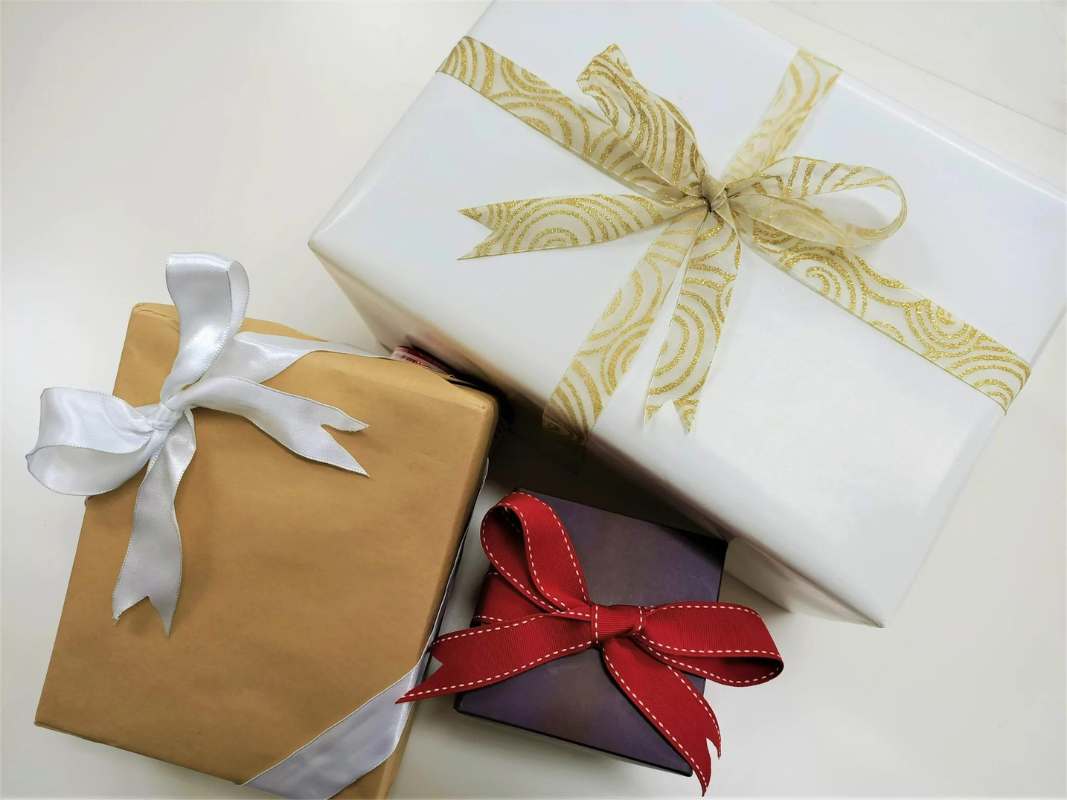
A well-tied bow adds elegance to any wrapped gift.
- Techniques:
- Choose ribbon types such as satin, grosgrain, or organza. Practice tying different styles, like the classic bow, layered bow, or looped bow.
- DIY Guide:
- Materials Needed: Ribbon, scissors.
- Steps:
- Cut the ribbon to the desired length, allowing extra for tying.
- Wrap the ribbon around the gift and tie a knot.
- Create loops on each side of the knot, adjusting them for symmetry.
- Secure the loops by tying another knot or using a small piece of wire.
- Trim the ribbon ends at an angle for a neat finish.
Using Adhesives
Proper use of adhesives ensures that the wrapping stays intact and looks neat.
- Best Practices:
- Use double-sided tape for a clean look, or glue dots for securing decorations. For heavier gifts, consider using fabric glue or strong adhesive tape.
- Tips:
- Avoid overusing tape to maintain a polished appearance. Ensure all edges are neatly folded and secured.
- DIY Guide:
- Materials Needed: Double-sided tape, glue dots, fabric glue.
- Steps:
- Use double-sided tape along the edges of the wrapping paper for a seamless finish.
- For heavier decorations, use glue dots or fabric glue to ensure they stay in place.
- Press firmly to secure the adhesive and maintain a clean look.
Mastering the Gift Wrapping Techniques
Gift wrapping techniques not only enhance the appearance of a gift but also show the thought and effort put into the gesture. From traditional methods like Furoshiki and Bojagi to modern and eco-friendly approaches, there are endless ways to make your gifts stand out. Experiment with different techniques and find your unique style to make every gift-giving occasion special.
At Kiricard, we honor the tradition of craftsmanship by creating exquisite pop-up cards that capture the essence of artistry and creativity. Each card is meticulously designed to bring joy and wonder to your celebrations, blending modern innovation with timeless techniques. Explore our collection and experience the magic of Kiricard’s craftsmanship.
Follow Our Blog for More Interesting News
Instagram | Facebook | TikTok | Pinterest
Stay connected and inspired! Follow our blog for more insights into the world of traditional crafts and creative gift ideas. Visit our blog to stay updated with the latest trends, tips, and stories celebrating the beauty of tradition and creativity.


 Christmas
 Father’s Day
 Valentine’s Day
 Easter
 Thanksgiving
 Halloween
 Birthday
 Wedding
 Anniversary
 Graduation
 Baby Shower
 House Warming
 For Him
 For Her
 For Kids
 Floral
 Animals
 Trees
Trees Architecture
 Vehicle
 LGBTQ+
 Just Because
 Pop-up Box
 Pop-up Stand