Blog
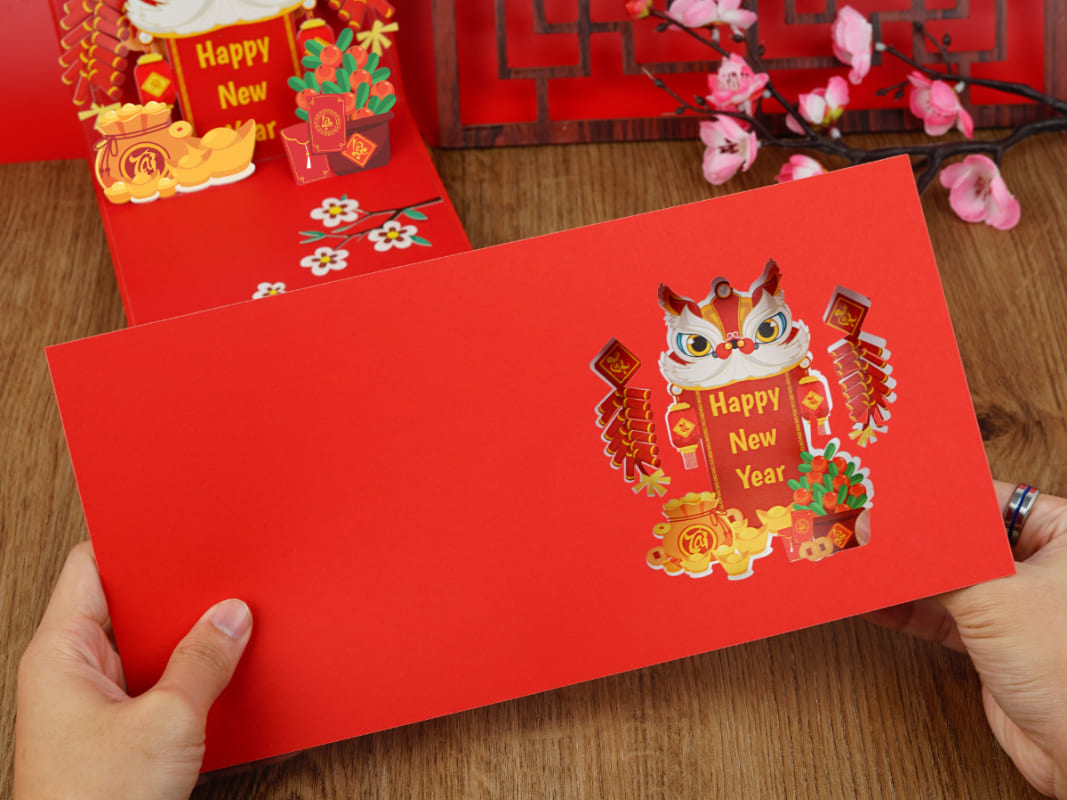
Pop Up Lunar New Year Card Template | Free Pop Up Card Template Download
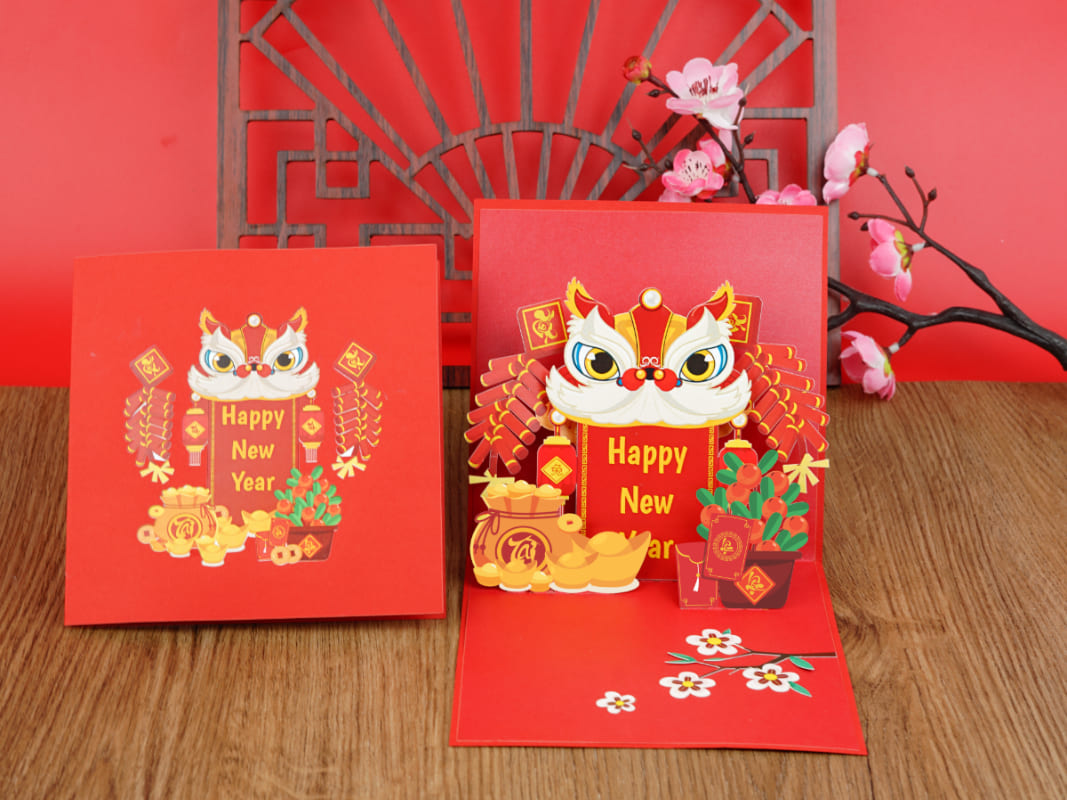
Lunar New Year is coming close, are you ready to add an extra sparkle to your celebrations this year? Let’s dive into the charming world of DIY and create a stunning pop-up Lunar New Year card together. These aren’t just any cards; they are your personal handcrafted treasures, filled with love and festive cheer.
In this easy-to-follow guide, we’ll take you through each step of making your own pop-up Lunar New Year card. Whether you’re a crafty pro or just starting out, this project is perfect for everyone. However, if you own a laser cutting machine at home, things will be easier for you as we provide our free template for this at our website, which you can download below:

We’ll use vibrant colors, festive symbols, and a touch of creativity to make cards that will surely bring smiles to your loved ones. So, let’s gather some simple supplies and start this fun crafting adventure. Here’s to a Lunar New Year filled with joy, creativity, and lots of homemade pop-up surprises!
Gathering and Preparing Your Materials for Your Pop-up Lunar New Year Card
First things first, let’s talk about what you’ll need to bring these pop-up cards to life. Don’t worry, you won’t need anything too fancy or hard to find – most of these items might already be waiting for you in your craft drawer! The entire process is simple – no fancy craft tools are required. All you need are:
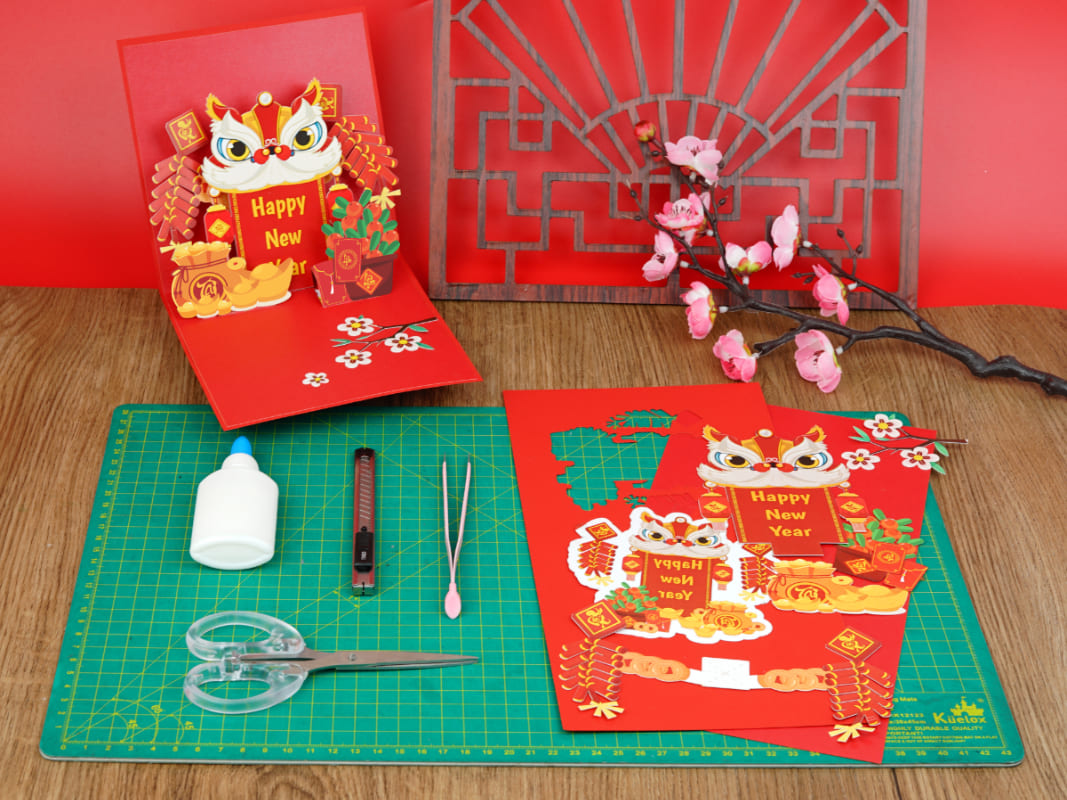
- Cardstock paper: This will be the base of your card. Choose some nice, sturdy paper, preferably in red or gold, to really capture the Lunar New Year spirit.
- Scissors and Knife: A good pair of scissors or a small knife is a must for precise cutting.
- Cutting Board: A sturdy and safe surface for precise cutting and protects your table or workspace from scratches or damage.
- Glue: This will hold your pieces together. Any standard craft glue should do the trick.
- Decorations: Think about what sparks the “Lunar New Year” vibe in your mind. Red and gold paper, stickers, or even some glitter can add that festive touch.
Remember, the best part about DIY is making it your own, so feel free to get creative with your materials. Maybe there’s a special type of paper or a unique decoration that reminds you of Lunar New Year celebrations from your childhood. Feel free to include it!
In case you have already owned a laser cutting machine, now is a good time to make good use of it. The template for this pop-up Lunar New Year card is available on our website for free, you can download it above button.
Designing and Crafting Your Pop-Up Lunar New Year Card
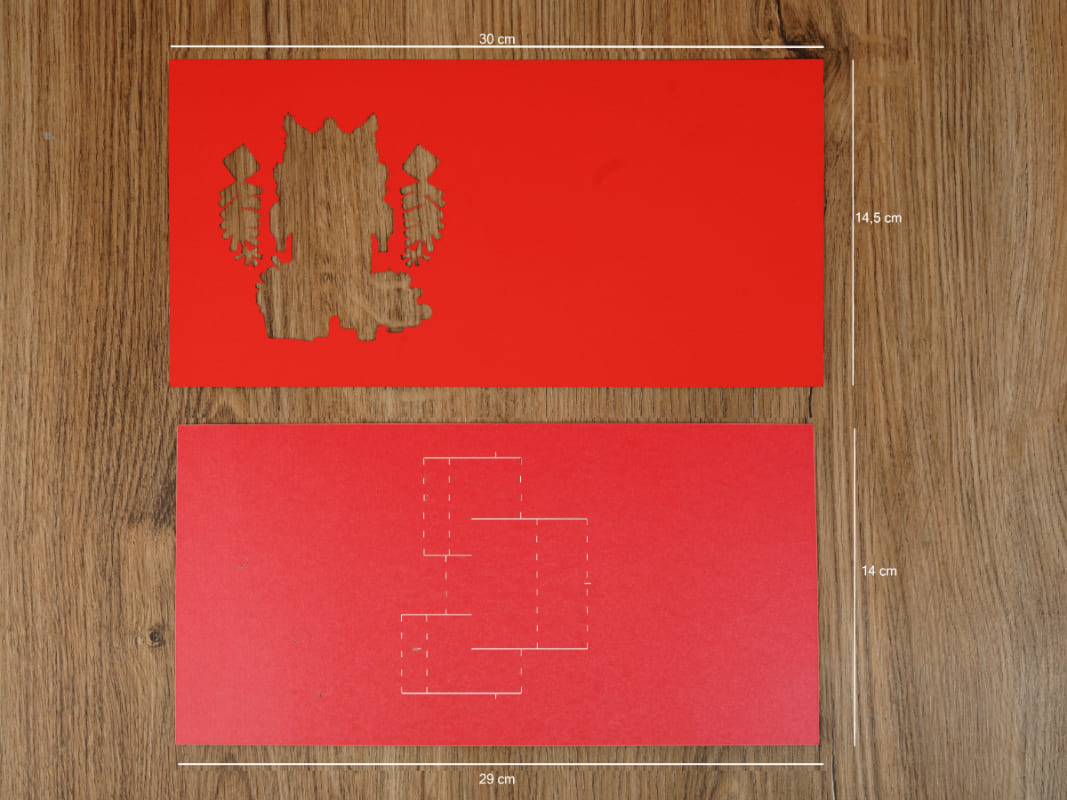
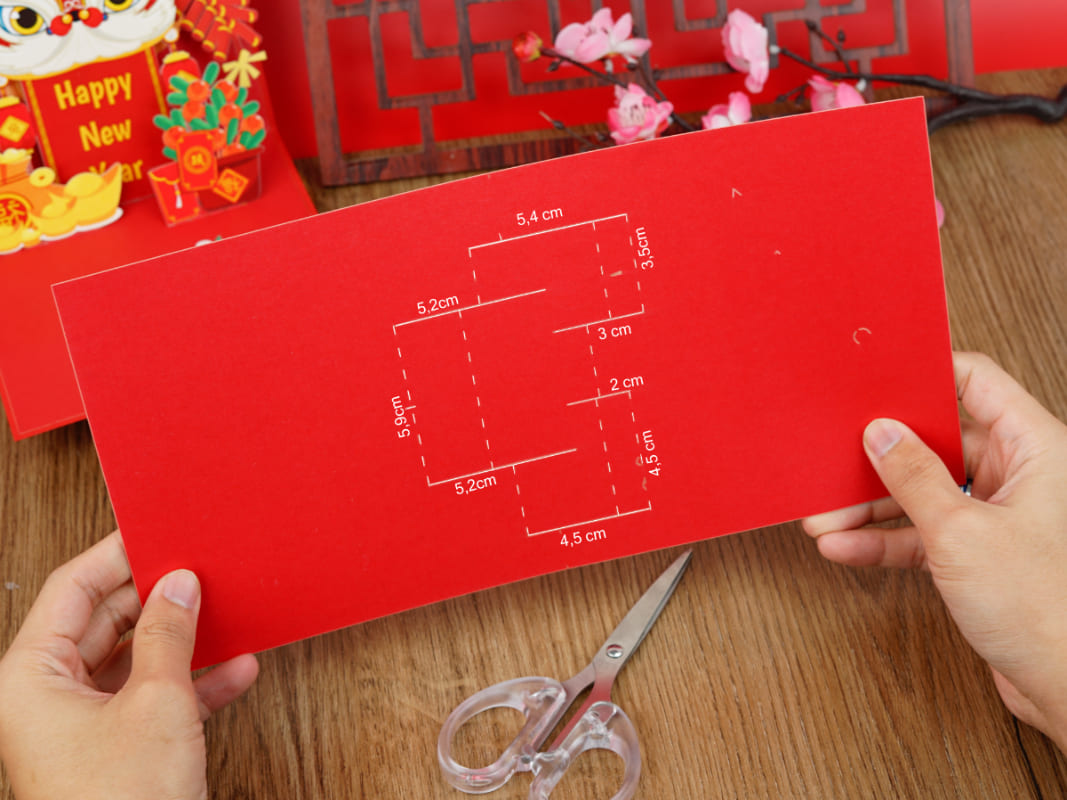
Step 1: First, we’re going to make a pop-up card that snuggles right inside your main cover card – kind of like a little surprise inside a surprise. For the cover, you can use a card you’ve already bought, or let’s get crafty and make both from scratch. For the pop-up card inside, the key is to have its size fit inside the cover. First, cut 2 pieces of paper following the image below:
Step 2: If you’re feeling creative and want to make the cover card yourself, here’s a fun and easy idea: pick a bright and cheerful sticker and stick it right on the front. It’s a simple way to add a splash of color and joy to your card.
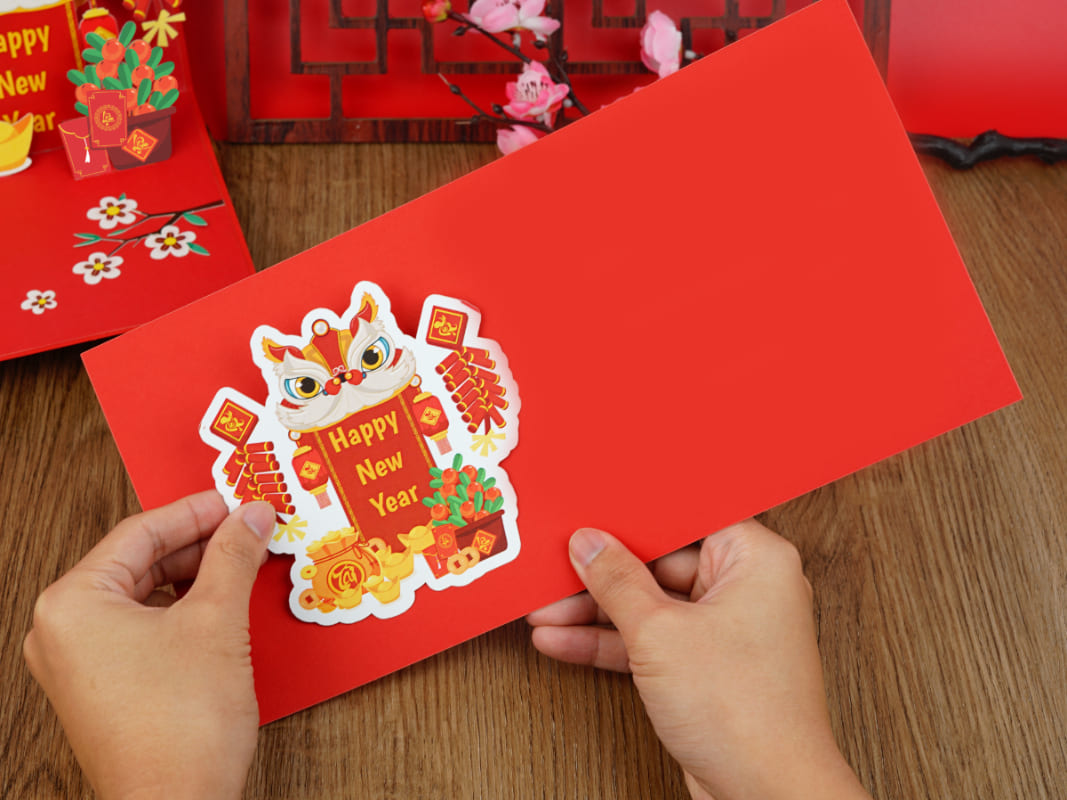
But, if you happen to have a laser-cutting machine at home and you’re up for a little challenge, we can take it up a notch. How about we cut out the shape of the sticker from the cover card using the laser cutter? The shape of the sticker might be a bit tricky to cut out by hand because it can have lots of small details. That’s where the laser cutter comes in handy – it’s perfect for getting all those intricate details just right. Then, place the sticker inside the card, so it peeks through the cut-out shape. It adds a really cool 3D effect, this little touch could really make your card stand out
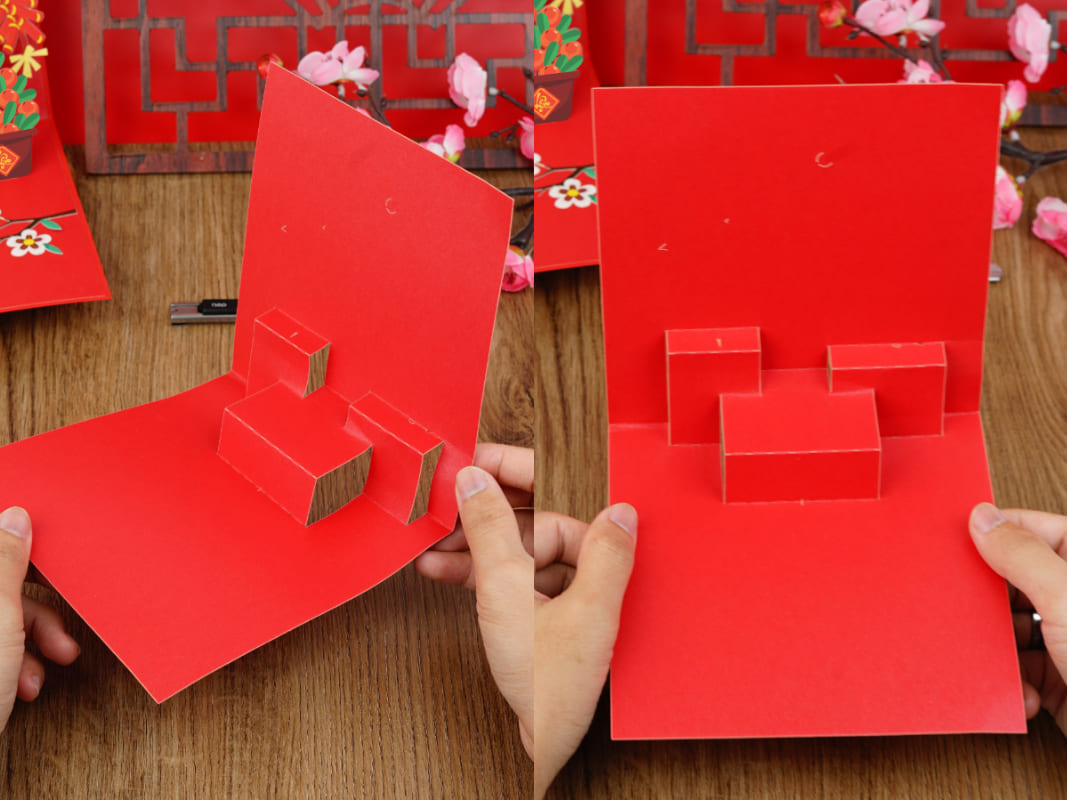
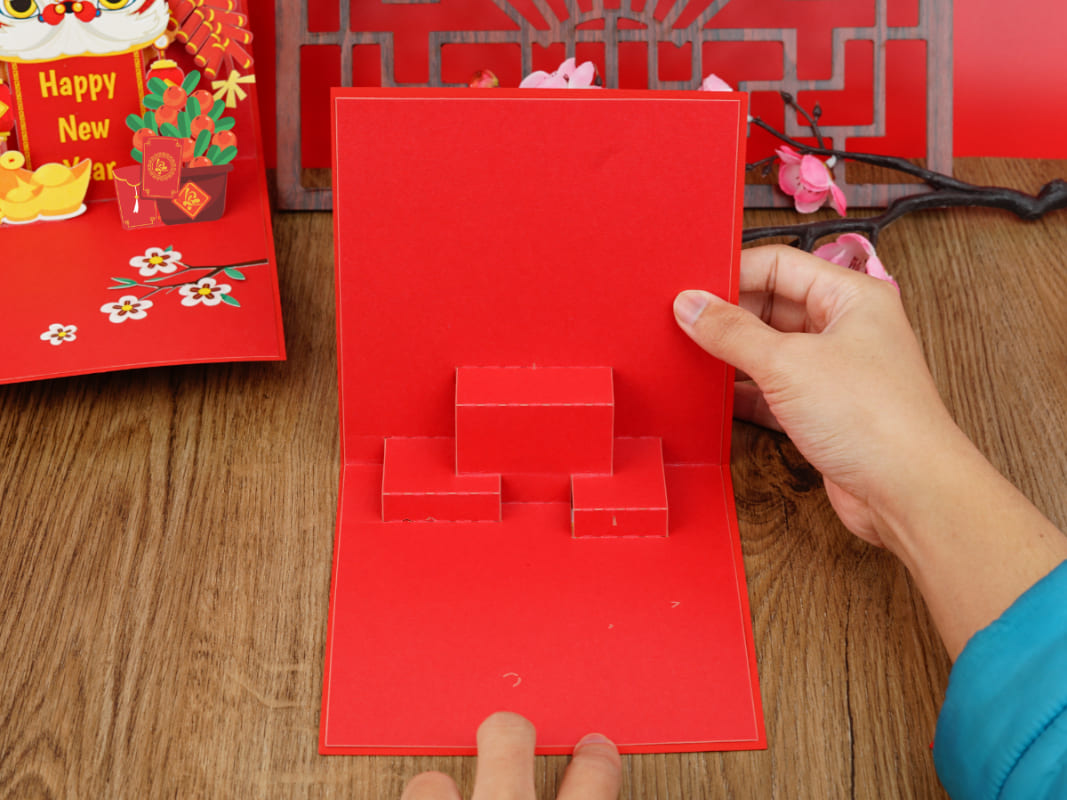
Step 3: Now, let’s add the layers of the pop-up card inside. These little layers are super important because they’re what make your pop-up decorations come to life! You can create just one big layer or a few smaller ones, depending on how many pop-up surprises you want. For this particular guide, we went for three layers in the card – two lower on the sides for extra pop-up decorations, and a larger one in the middle for a large “Happy New Year” banner. Follow the image below and cut marked straight lines but do not cut dotted lines
Step 4: Next, fold the dotted lines of these layers inside the Lunar New Year card. These folded layers are going to be the spots where we attach our lovely pop-up decorations and stickers, like a cheerful collage or some adorable photo cutouts.
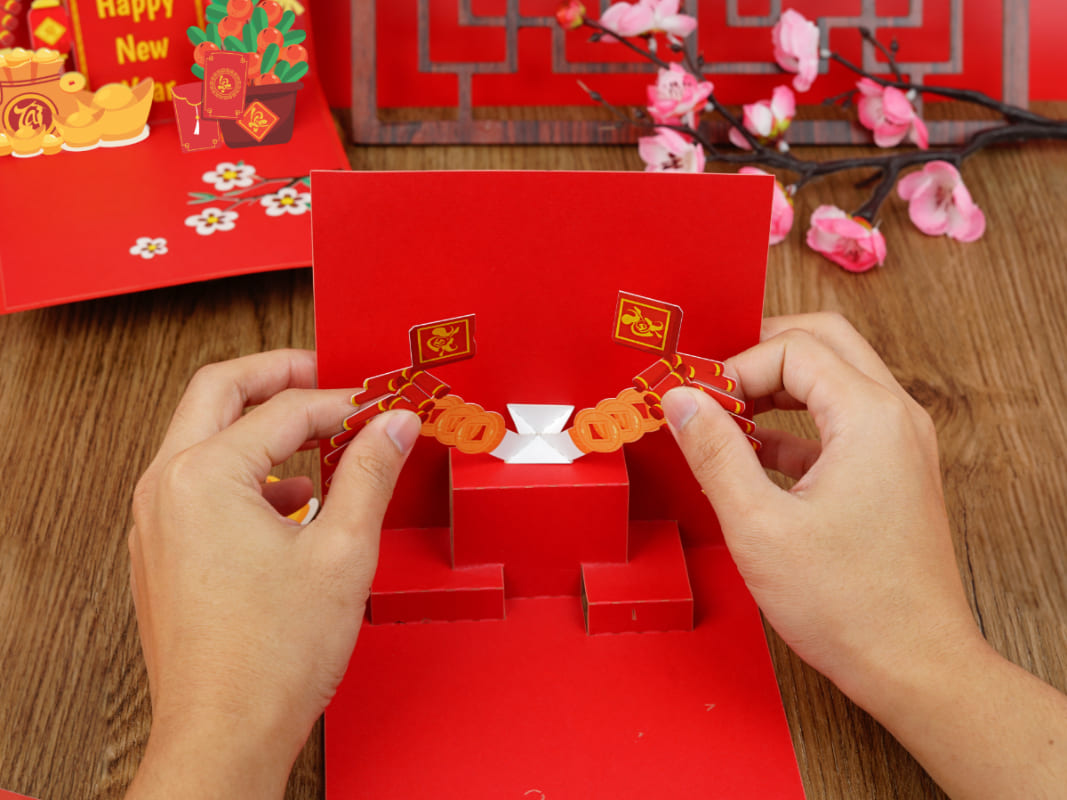
Step 5: We’re going to add a little pop-up tab decorated with vibrant firecracker stickers on both sides. But feel free to get creative here – if firecrackers aren’t your style, you can replace them with any sticker. Folding this tab is key to our pop-up surprise. Just follow the dotted lines shown in the picture below, folding gently but precisely.
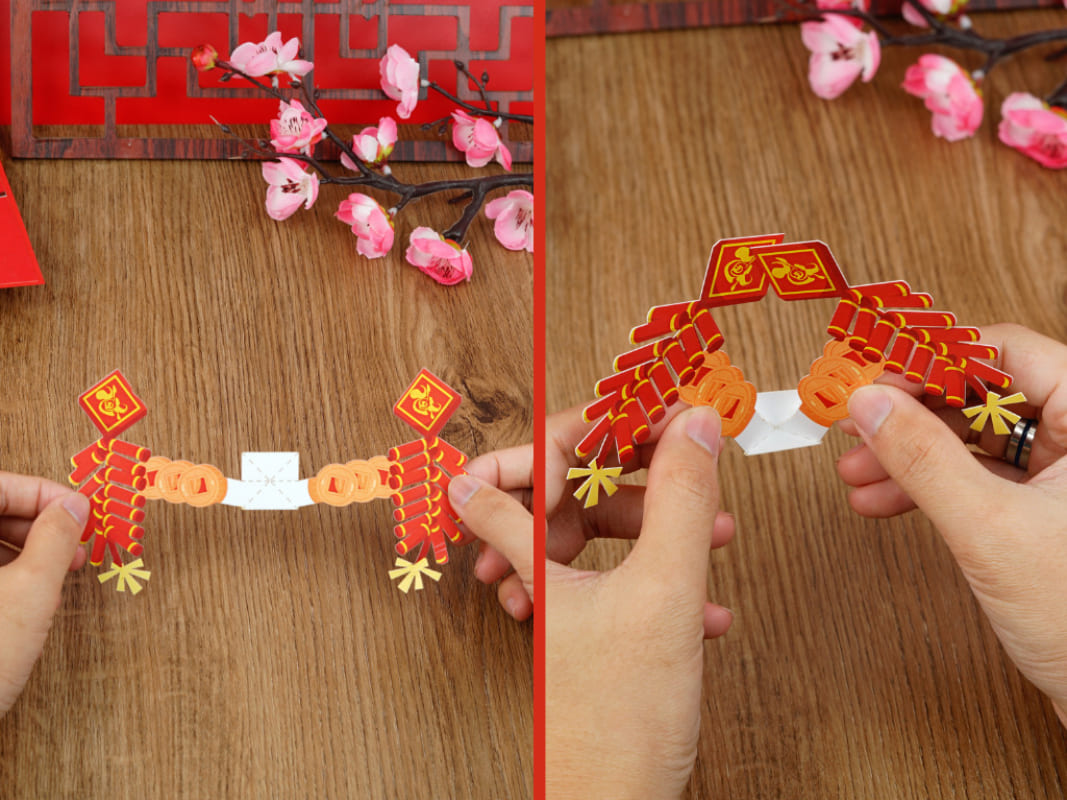
Once you’ve got the fold just right, it’s time to glue this right on top of the highest layer of your card.
Step 7: Alright, we’re going to attach the inner card to the cover card, but let’s do it gently to keep everything in perfect shape. Grab your glue and let’s get to it. You’ll want to run a thin line of glue all around the edges of the inner card – that’s the top, bottom, and both sides. This will make sure it sticks nicely to the cover card. Oh, and don’t forget a small dab of glue right in the middle for extra hold. This will keep your card nice and sturdy.
Now, here’s a little tip: be extra careful around the pop-up parts. We want them to move smoothly when the card opens. So, make sure the glue doesn’t get on those moving layers. We wouldn’t want to spoil the pop-up surprise!
Step 6: It’s time to get creative and think about the pop-up decorations for your Lunar New Year card. This is where your card really gets personal. You can cut out stickers that remind you of the Lunar New Year, draw something special, or even use little photos to make it extra personal. We love using a glue stick for this because it’s quick and clean, and it won’t make your paper all wavy. A little bit of glue here and there and your pop-up pieces will be good to go.
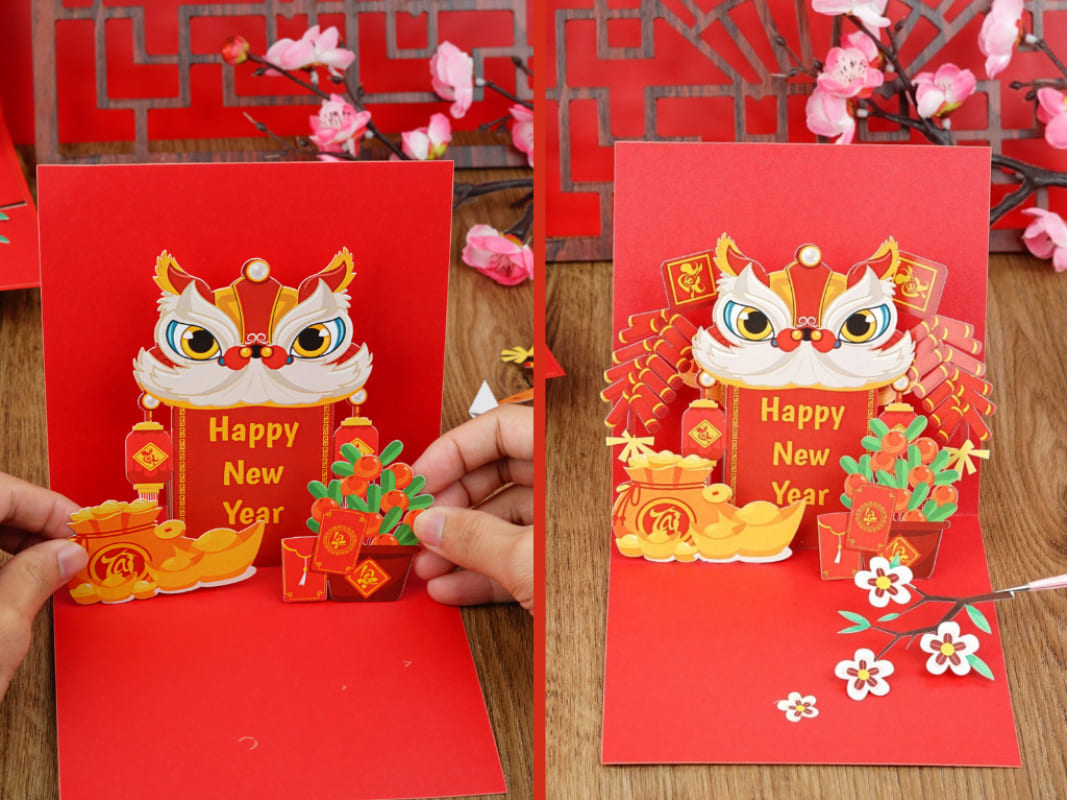
And there you have it! Once the glue is all dry, your lovely, handmade pop-up card is all set to bring joy and Lunar New Year wishes to someone special. It’s like a little bundle of happiness, ready to unfold and surprise. Now, it’s time to add your personal touch with a Lunar New Year message inside. Sending this card is like sharing a piece of your heart. Whether your design is simple or super fancy, the real magic is in creating it with love and sharing it with others. Wishing you a fantastic Lunar New Year filled with fun crafting moments!

Check out our Free Pop Up Card Template Hub for more DIY designs!


 Christmas
 Father’s Day
 Valentine’s Day
 Easter
 Thanksgiving
 Halloween
 Birthday
 Wedding
 Anniversary
 Graduation
 Baby Shower
 House Warming
 For Him
 For Her
 For Kids
 Floral
 Animals
 Trees
Trees Architecture
 Vehicle
 LGBTQ+
 Just Because
 Pop-up Box
 Pop-up Stand